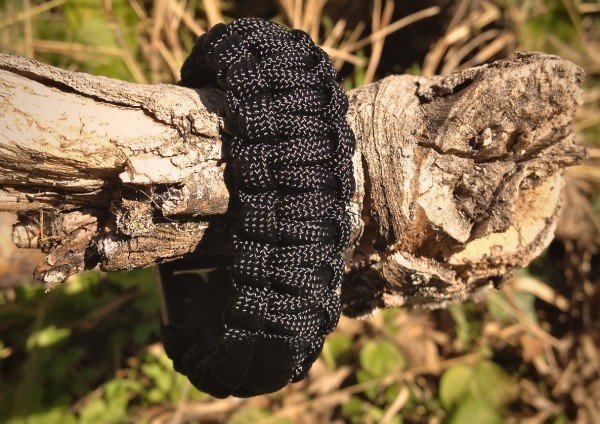
How to Make Paracord Survival Bracelets | 16 Cool Projects
5:26 AMA paracord survival bracelet is a great tool for any prepper to have around. Having several DIY paracord bracelets around is even better, super cool ones you made yourself. What a fun and practical way to get prepared!
Keeping your emergency paracord around your wrist and ready to quickly deploy in the case of a survival situation is a simple way of being prepared no matter where you are.
With all the different types of paracord bracelets on this list, you’re sure to find one the meets your needs. We think you will find several paracord projects you love.
This goes way beyond personalizing your bracelet with colors.
The Firekable paracord bracelet even has a fire starter and whistle. Click here to get one for FREE.
We have 16 options not only look different, but serve different purposes. Check out these different paracord bracelet weaves and pick one that works best for you.

How To Make Paracord Bracelets
Our best list of cool 550 Paracord Project Ideas
1. Fishtail Paracord Survival Bracelet
This simple bracelet deploys quickly and is lightweight.
2. Law Enforcement Style Paracord Survival Bracelet
The law enforcement style bracelet is made for optimum utility and ruggedness.

Love these paracord bracelet ideas? Pin the image below.
Follow Survival Life on Pinterest for more cool DIY prepping projects
3. Blaze Bar Quick Deploy Paracord Survival Bracelet
This weave is specially designed for fast deployment in the event of an emergency.

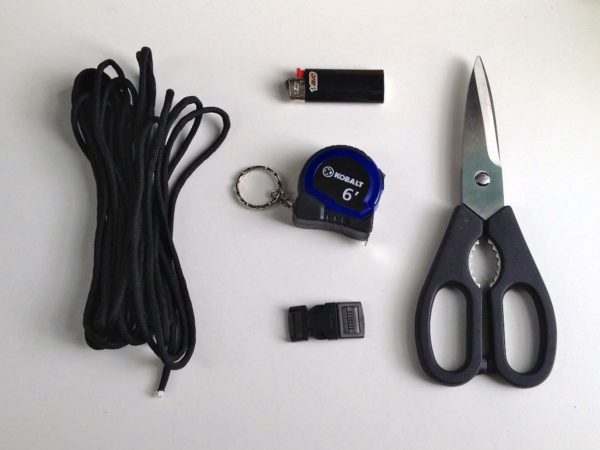
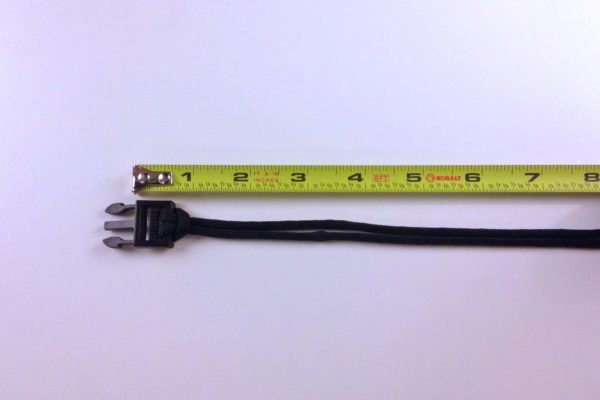
Supplies you need:
- 13 ft of 550 Paracord (makes 8.5″ bracelet)
- 1/2 in side release buckle
- scissors
- lighter or matches

- Supplies for the Blaze Bar Quick Deploy Paracord Bracelet
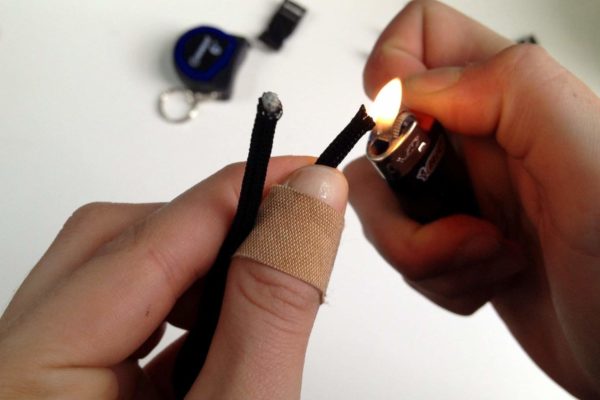
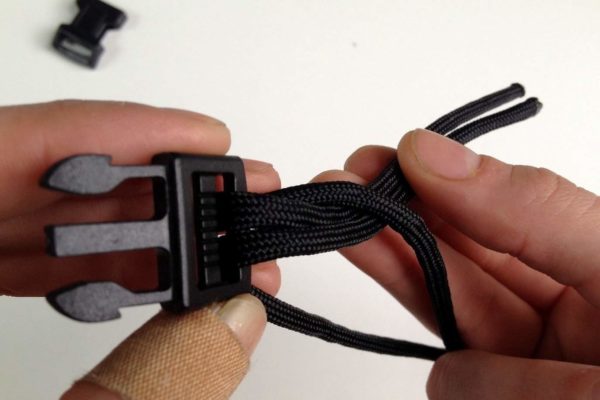
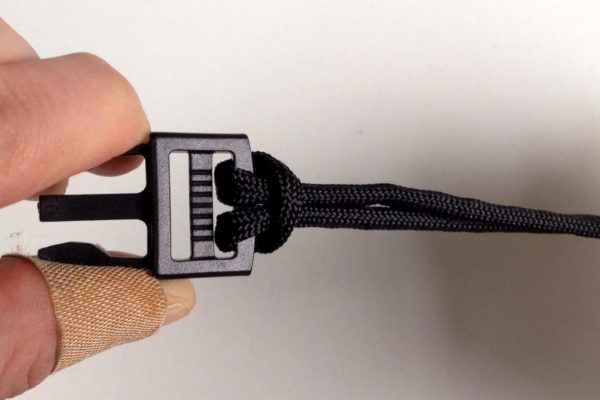
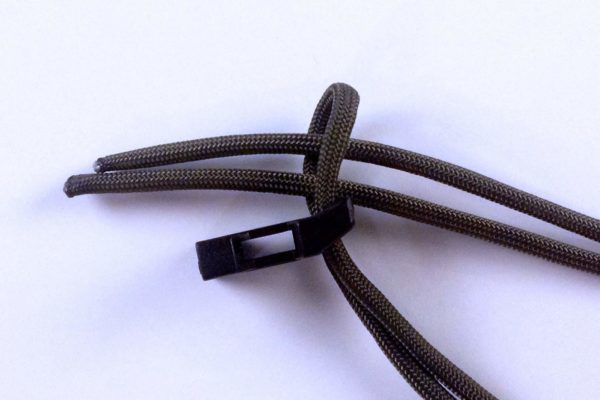
Step 1:
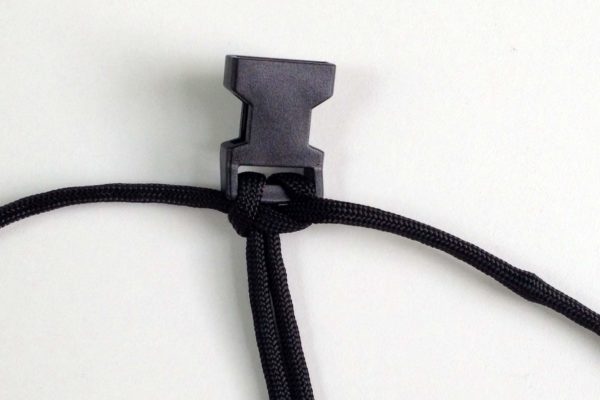
To get started, attach your paracord to one side of your buckle:

- Fold your piece in half and thread it through the buckle.

- Pull the ends through the loop you made and pull tight.

- When you start your bracelet, it should look like this.
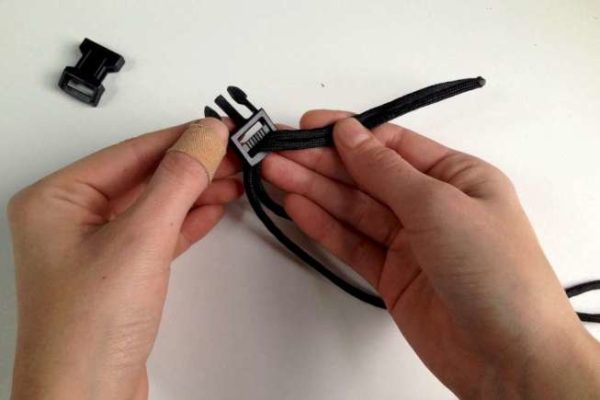
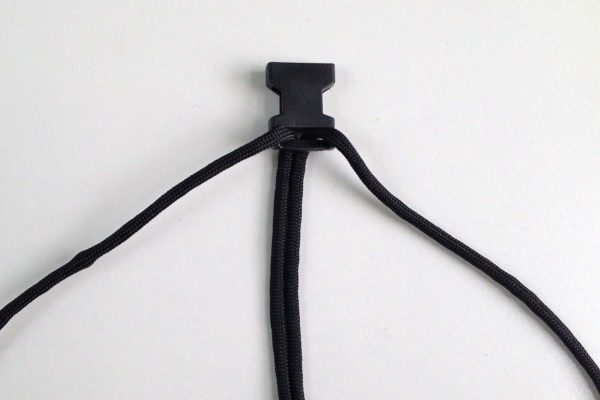
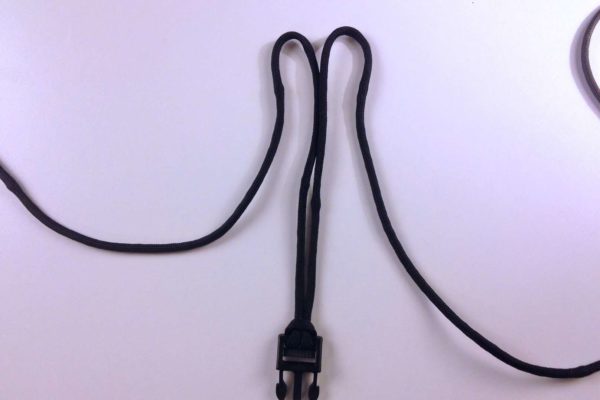
Step 2:
Attach the other buckle and size it to your wrist:

- Thread the loose ends through the second buckle piece.

- Pull the buckle up along the cord until you are at your desired bracelet length.

- Loop the ends back up towards the first buckle.
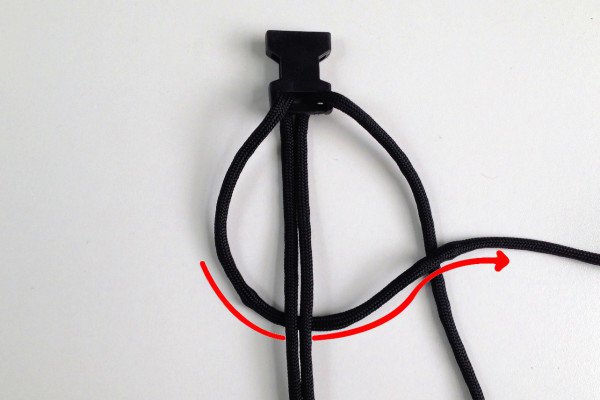
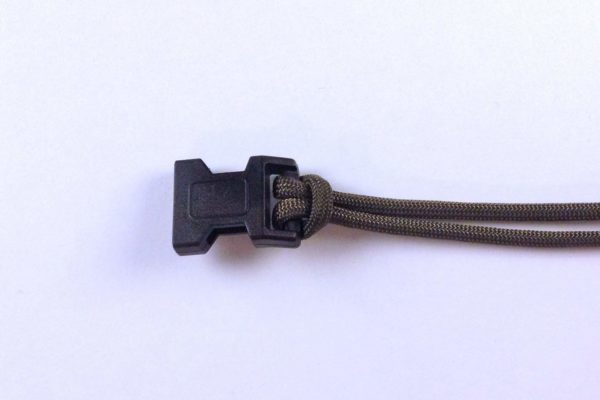
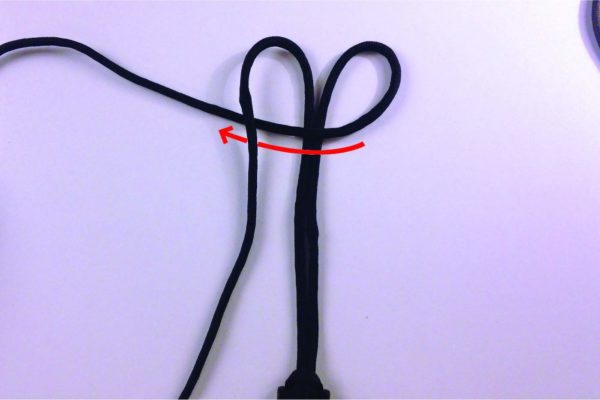
Step 3:
Start weaving your bracelet:

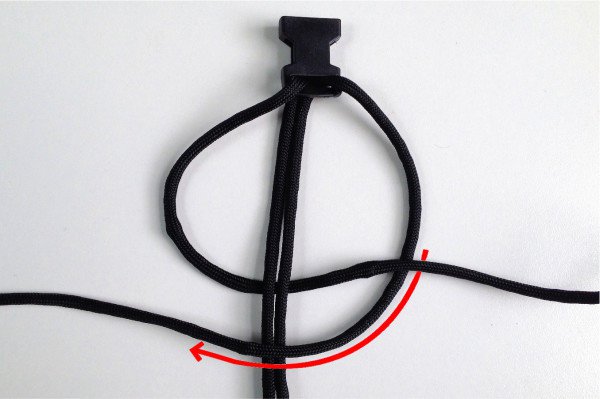
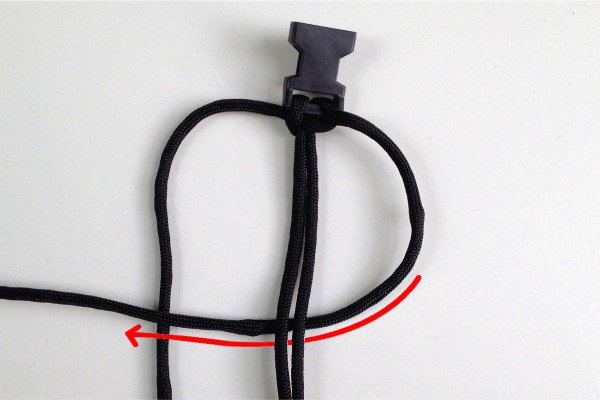
- Hold the ends so the left free strand is on the left side of the buckle and the right strand is on the right side.

- Take the left strand around the front and loop it around all the pieces of paracord.

- Pull it back to the left side.
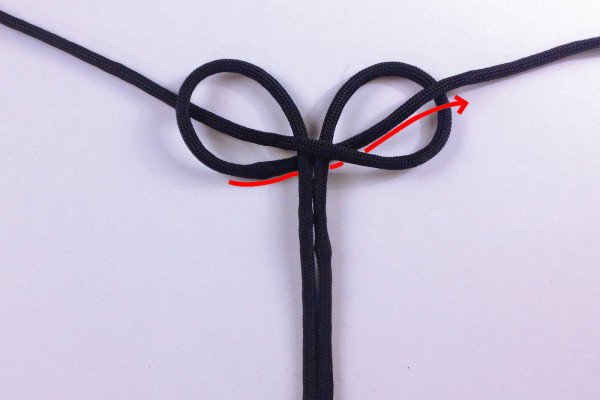
Step 4:
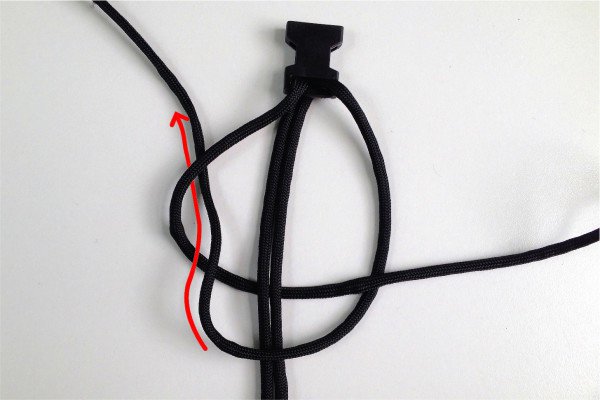
Start with the strand on the left that is free hanging:

- Starting with the left piece, thread it over the left core section.

- Take it under the right core section.

- Over the right free strand.

- Now, take the right free strand. Keeping it under the left free strand – pull it over the right core section.

- Underneath the left core section and up through the loop created by your left strand.

- Pull to tighten.
Step 5:
Now, start the second section with the free strand on the right…
4. Super Strong Paracord Survival Bracelet
This weave will stand up to just about anything with its boosted durability.
5. Ladder Rack Knot Paracord Survival Bracelet
This weave gives you more paracord than the average weave, but not so much that it’s big and bulky on your wrist.
6. Cobra Paracord Survival Bracelet
This bracelet is nice and rugged, giving you a good amount of paracord and strength with this weave.
Supplies you need:
- 10 feet of Paracord
- Side release buckle
- Tape Measure
- Scissors
- Lighter
Step 1:
Once you cut your paracord to the desired length (about 10 feet), seal the end using your lighter. You don’t want to be working with a frayed end. Now, measure your wrist size by taking one end of the paracord and wrap it around your wrist. Lay that section next to your measuring tape to see how many inches long your bracelet will be.

Step 2:
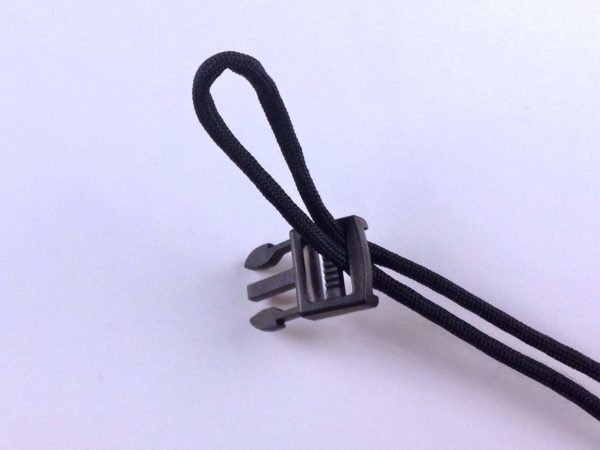
Let’s first attach the male buckle to the paracord. To do this, fold your piece of paracord in half and pull the ends through the bottom slot of the buckle.
Then pull the ends through the loop created by your paracord. Pull them all the way through until the paracord is secured around the buckle.
- Pull the ends through the buckle.
- Loop the ends of the paracord back through the loop.
- Pull tight to secure around the buckle.
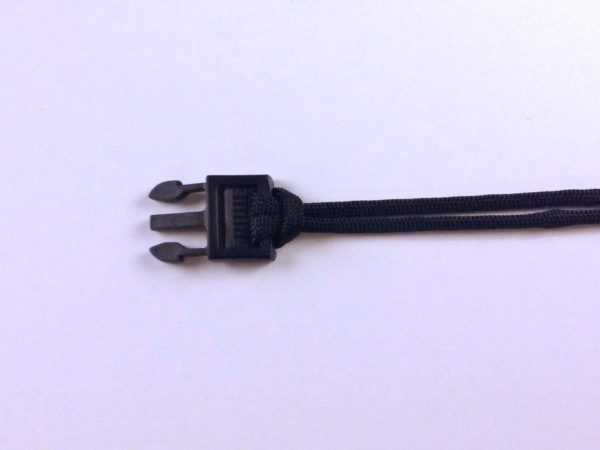
Step 3:
Now let’s attach the other end of the buckle. Pull the paracord through the slot on the buckle. Using your measuring tape, slide the buckle along the paracord until you reach you desired bracelet length.
For this example, the bracelet is 6.5 inches. Be sure to include the center of the male end of the buckle up to the end of the female buckle in your measurements. (See picture below)

- Pull on the second buckle to the length you measured for your wrist.
- You will start your bracelet from the buckle you just threaded.
Step 4:
Now we are ready to make our bracelet!
- Pull the left strand under the center pieces and over the right strand.
- Pull the right strand over the center pieces.
- Pull the right strand over then under and through the left strand.
- Pull each strand outward to tighten your first knot.
Step 5:
You made your first knot! Now let’s do the same thing, but start with the right strand.
7. Extra Wide Paracord Survival Bracelet
This “dragon’s tongue” weave is extra thick, meaning that you have extra paracord on hand for emergencies.
8. Jagged Ladder Paracord Survival Bracelet
This is a compact weave that is sturdy but not bulky.
9. Tire Tread Paracord Survival Bracelet
This bracelet is woven for easy deployment.

Supplies you need:
- Two 9ft pieces of paracord
- Side release buckle
- Tape Measure
- Scissors
- Lighter

Step 1:
For this tutorial, we are going to start with the green paracord. First, fold the green paracord in half to find the center. Take that loop and feed it through the slot on the female side of the buckle.
Pull the ends through and firmly tighten around the buckle.

- Fold the green paracord in half and pull the loop through the buckle.
- Pull the ends all the way through the loop and tighten.
- Pull until the paracord is snug around the buckle.
Step 2:
Let’s go ahead and do the same thing with the black paracord to attach it to the male side of the buckle.
- Take the black strand of paracord and attach it the same way to the other end of the buckle.
- Pull it snug around the buckle.
Step 3:
Now let’s prep our black paracord to attach it to the green paracord by making some bunny ear loops.
• First, you’ll want to measure the length of your bracelet using your measuring tape. Keep in mind that you want to include half of the buckle in this measurement. For this tutorial we are making a 7 inch bracelet.
• Using your finger to keep the length of the bracelet in tact, fold the two ends down to create two loops.
• Then take the right strand and pull it over the center and under the left strand.
• To finish it off, take the left strand under the center and up through the right loop. (See photos below)
- Measure the paracord to the length you want your bracelet.
- Take your green paracord and fold the ends down to make two loops at the length you measured for your bracelet.
- Take the right strand and pull it over the center pieces and under the left strand.
10. Thin Soloman Bar Paracord Survival Bracelet
This is a great bracelet for those who don’t need a lot of paracord on and and want a thinner bracelet.
11. Slithering Snake Paracord Survival Bracelet
This is another relatively thin bracelet for those who don’t want the bulk.
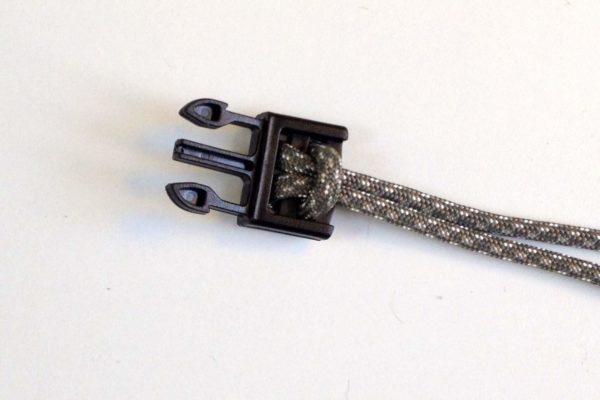
12. Oat Spike Paracord Survival Bracelet
This simple weave feels good on the wrist and is easy to deploy.

- How To Tie A Paracord Bracelet: Oat Spike
A paracord survival bracelet is a versatile tool that can come in handy for a number of emergency situations. Whether you are a survivalist, frequent hunter, outdoors person or just value the need to be prepared at all times, knowing how to tie a paracord bracelet is a great skill. Knowing how to tie several is even better- try making our Cobra Paracord Survival Bracelet and our Tire Tread Paracord Survival Bracelet
In this tutorial, you will learn how to make the Oat Spike Survival Bracelet.
How to Tie A Paracord Bracelet – Oat Spike Paracord Survival Weave
Supplies you need:
- Two 8 ft pieces of 550 paracord
- Side release buckle
- Tape Measure
- Scissors
- Lighter

- Supplies you need when you make an oat spike paracord bracelet
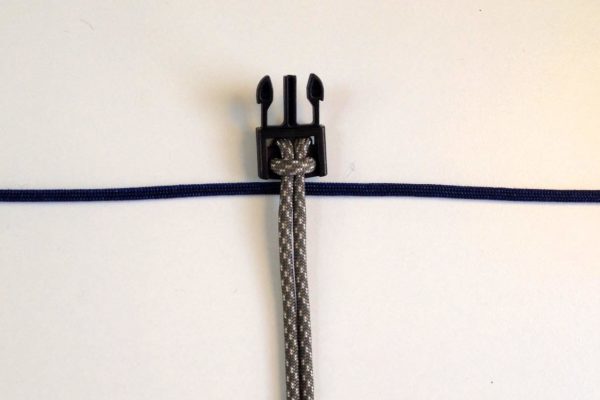
Step 1: Get Started
In order to get started, make sure the ends of your paracord are trimmed and singed.
Then, fold each piece in half to find the center points.
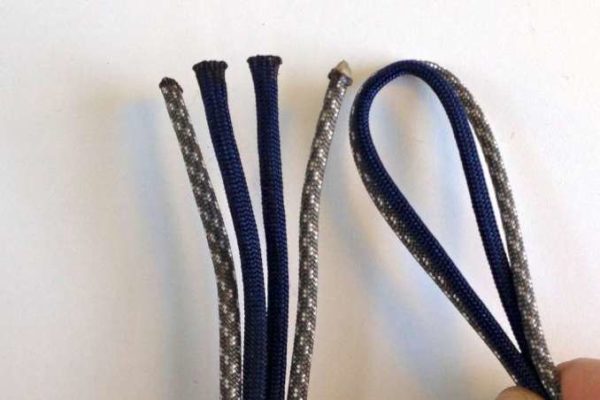
- Fold both piece of paracord in half to find the centers.
Step 2: Put on the first buckle
Starting with the grey paracord, slide on the first buckle:
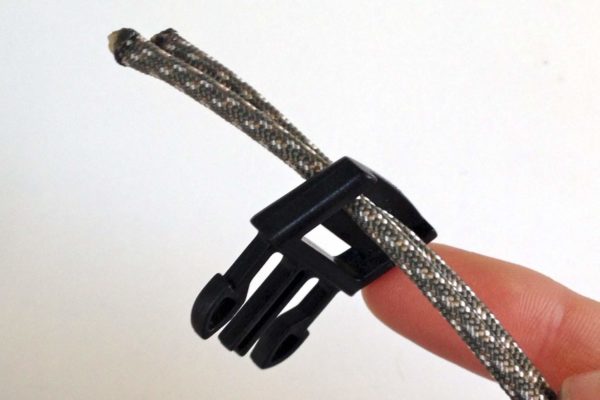
- Take the grey piece and thread the two ends up the first slot of the male end of the buckle and back down through the second slot.
- Now bring them back down through the second slot.
- Pull the ends through the loop to fasten the buckle onto the paracord.
- Pull to tighten.
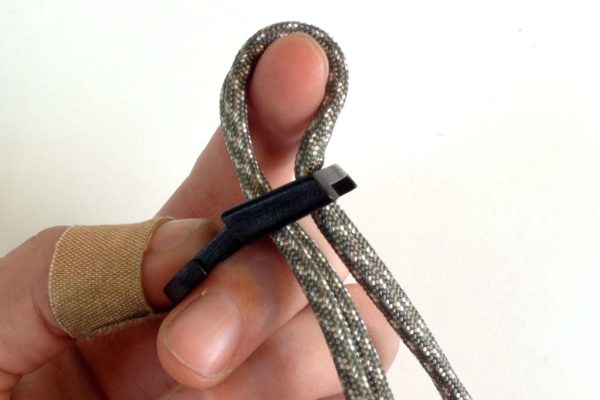
Step 3: Start weaving
Lay your blue paracord behind the grey to start:
- Lay your paracord so the center of the blue piece is behind the grey piece.

- Cross the blue strands around in front of the grey.

- Starting with the right strand, pull the grey strands up and under the blue loop.
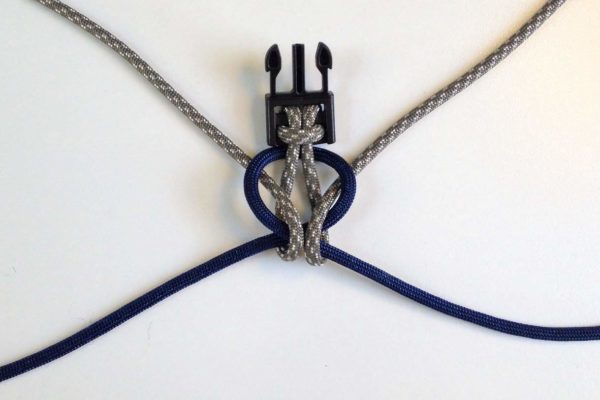
- Do the same thing with the left side.
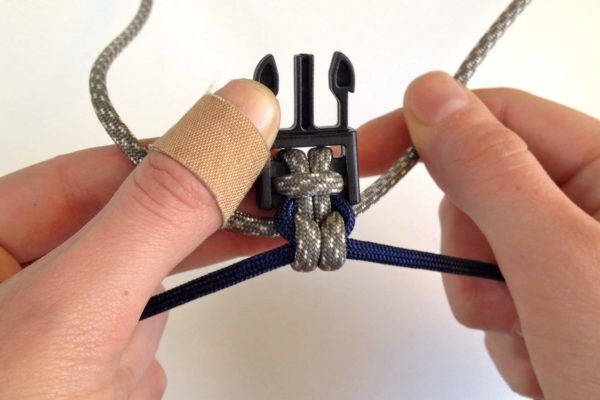
- Pull to tighten.
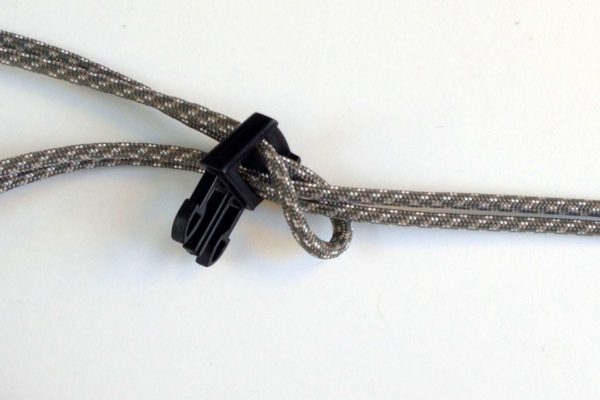
Step 4: Continue on down the bracelet…
13. Sawtooth Paracord Survival Bracelet
This compact weave gives you a surprising amount of paracord when you deploy.
14. 90 Second Paracord Survival Bracelet
This quick bracelet deploys in 5 second for the ultimate quick deploy!
15. Easy Paracord Survival Bracelet
This bracelet is a great one to start out with if you’ve never made a bracelet before.
16. Shark Bone Paracord Survival Bracelet
On top of looking really cool, this weave is great for keeping a good amount of paracord on hand without too much bulk.


0 comments