40 Dreamy DIY Headboards You Can Make by Bedtime
2:16 PMThe best part is that most of these are really inexpensive and some can be made from things that you have just lying around the house.
Imagine a great new bedroom after just a couple of hours and with no money out of pocket! Actually, don’t just imagine it. Look through our great collection and make one of these headboards for yourself. We’ve got something in here for everyone and even a few for the kids. Get ready for the dreamiest of all bedrooms when you make these DIY headboards.
Imagine a great new bedroom after just a couple of hours and with no money out of pocket! Actually, don’t just imagine it. Look through our great collection and make one of these headboards for yourself. We’ve got something in here for everyone and even a few for the kids. Get ready for the dreamiest of all bedrooms when you make these DIY headboards.
Old Door Headboard
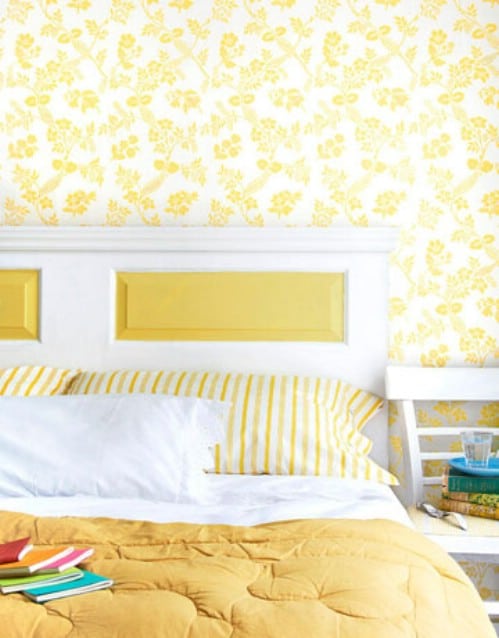
An old salvaged door makes a beautiful headboard and while other wooden headboards may run you hundreds of dollars, you can create this great DIY version for about 25 bucks. You will need to saw the door down to the size you need and then add some chair rail molding and a little paint and you end up with a beautiful wooden headboard that is completely customizable. What’s so great is that you can make this one in less than a day and you can paint it to perfectly match the other furnishings in your room. Plus, it’s really cheap so that’s a great point, too.
DIY Instructions and Project Credit – Countryliving
Cedar Fence Picket Headboard
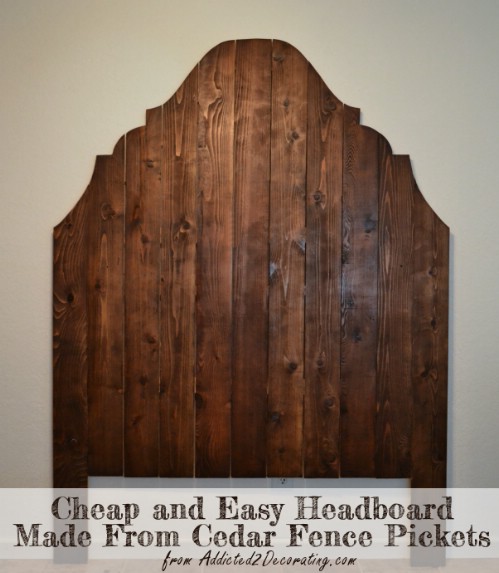
Cedar fence is a great material for making a headboard. Even if you don’t have any fencing on hand, you can make this beautiful headboard for about $25 depending on where you purchase the cedar pickets. You will also want to choose a stain color or just sheer coat it if you love the look of cedar. You will need to sand it down quite a bit because these are rough cedar fence pickets and you certainly don’t want to be getting splinters in bed. Overall, this is a really easy headboard to make and for less than $30, you just can’t beat the price. It’s also beautiful and makes a very bold statement.
DIY Instructions and Project Credit – Addicted2decorating
Upholstered Headboard with Nail Head Trim
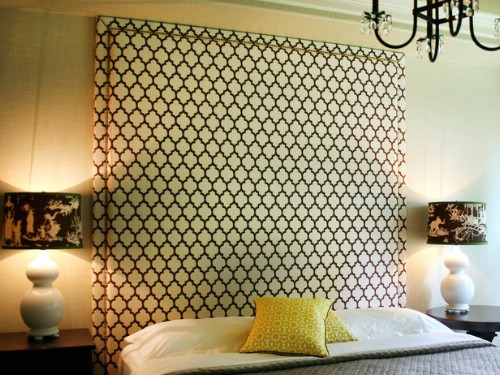
For an absolutely elegant and bold statement, this upholstered headboard is a must. As complicated and sophisticated as it looks, it really is an easy headboard to create. You will need a few supplies like plywood, fabric, nail head trim and a few tools but once you get started, you will see how really simple it is to create a fantastic headboard that looks like you paid a fortune for it. You can use whatever fabric you want although this one does give it a really elegant and classy look. If you get started now, you may just be finished by bedtime.
DIY Instructions and Project Credit – Hgtv
DIY Tufted Headboard
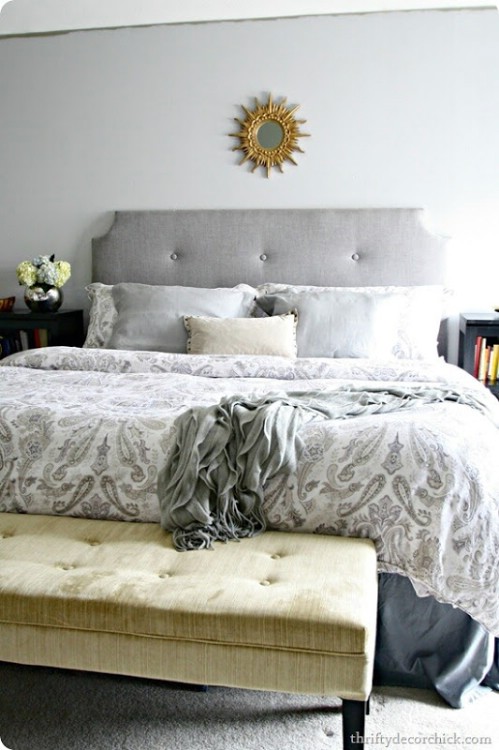
For less than $100, you can create a beautiful tufted headboard that is soft and shaped however you want. You will need to choose your shape first and then make sure that you have fabric and some foam on hand to create the headboard. You’ll cut the shape out of plywood and then cover that with foam (like from an eggshell mattress cover) and then cover again with fabric. The embellishments are completely up to you and the best part is that even without any of the supplies, this one will cost less than $100. If you have a few things on hand, we’re betting you can make it for less than $50.
DIY Instructions and Project Credit – Thriftydecorchick
Rustic Pallet Headboard
Pallets are often given away at home improvement stores, lumber yards or even flea markets and you can use those free pallets to create a beautiful rustic looking headboard. The number of pallets you need actually depends on the shape of the pallets that you use. You should expect to have a few mishaps if you are using older pallets so have at least two on hand when you begin. You will also need 2X4s for framing, nuts and bolts to hold it all together and your stain of choice. All in all, you should be able to build this for less than $20.
DIY Instructions and Project Credit – Ricedesignblog
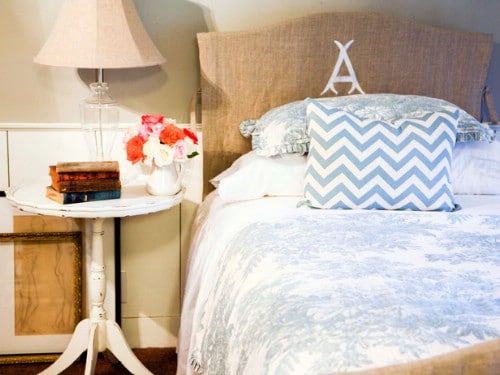
Monogrammed Fabric Headboard
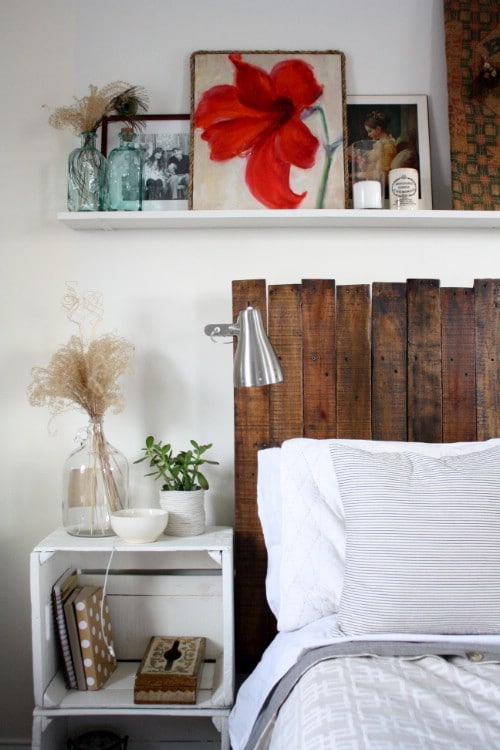
A wooden base, some material left over from other projects and a little creativity will allow you to build this gorgeous monogrammed headboard. You simply have to cover the wood base with fabric and staple it down. Then just add your monogram in whatever material you want. You could also paint it on with fabric paint. Be sure to print off the monogram from your computer to use as a template (it’s cheaper than buying stencils) and then apply it however you choose. This is a really beautiful headboard that is customized to make it extra-special.
DIY Instructions and Project Credit – Heavenstobetsyblog
Mantel Moulding Headboard
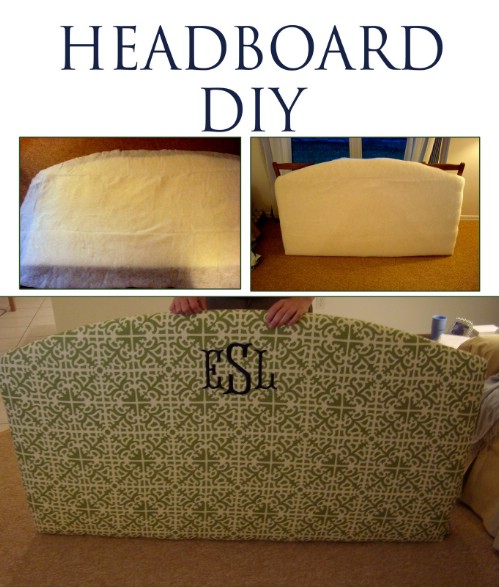
This mantel headboard was inspired by Pottery Barn’s Addison Headboard. Instead of buying it however, you can just make it yourself. It features loads of moulding which makes it very elegant and you can paint or stain it whatever color you want to match the rest of your bedroom décor. The best part is you can make this for about 1/5 of the price of Pottery Barn’s version and if you happen to have some moulding left over from home improvement projects, you can make it for nothing. Even if you have to buy the materials, you are still getting away loads cheaper than buying.
DIY Instructions and Project Credit – Ana-white
Buttoned Down Headboard
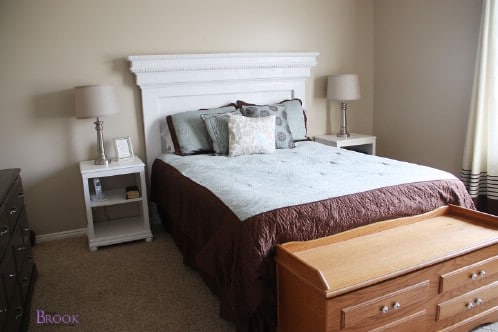
This DIY headboard is lovely with buttons to match the fabric cover but what makes it really special are the two sides that turn into the bed just a tad. It’s unique and really easy to make. All you need is some plywood, your fabric of choice and some rather large buttons to match. You’ll want something under the fabric to make it extra cushiony. The design makes it look like a daybed or couch, which is really neat. You just cover and tack or staple into place and you can cut the plywood for any size so it doesn’t matter what size your bed is, you can make this headboard for it.
DIY Instructions and Project Credit – Sarahmdorseydesigns
Faux Tiled Headboard
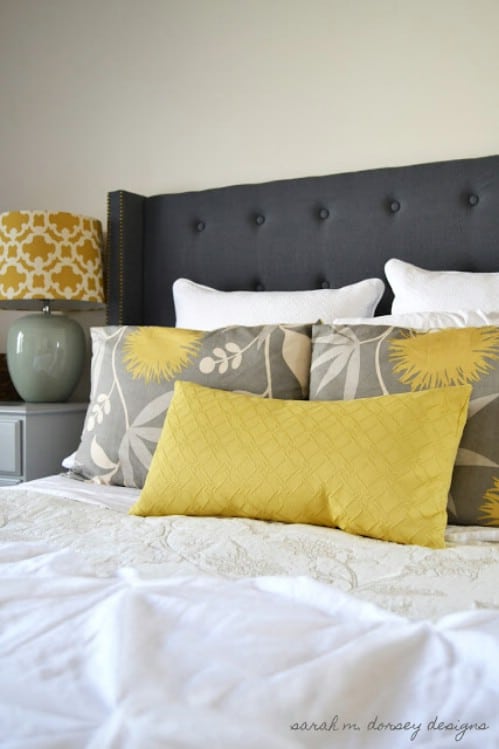
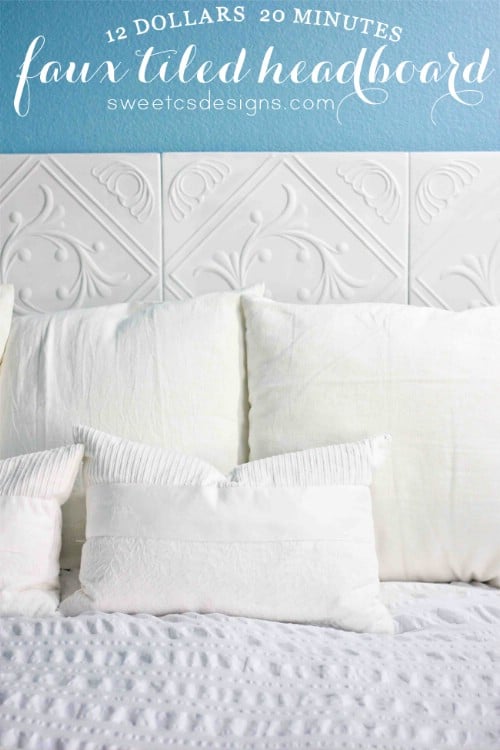
If you want a headboard that is cheap, easy to make and really unique, this faux tile headboard fits the bill. The neat thing is that these tiles are foam and they cost less than $5 in many online stores. You just mount them with mounting tape and you can paint them whatever color you want. If you are looking for a great metal tile look, just spray them with spray paint that will give them a great hammered metal look. White looks beautiful and the best thing is (aside from how cheap and easy it is to create, that is) they are foam so they’re really comfortable. You know, in case you bang your head on them.
DIY Instructions and Project Credit – Sweetcsdesigns
Painted Floral Headboard
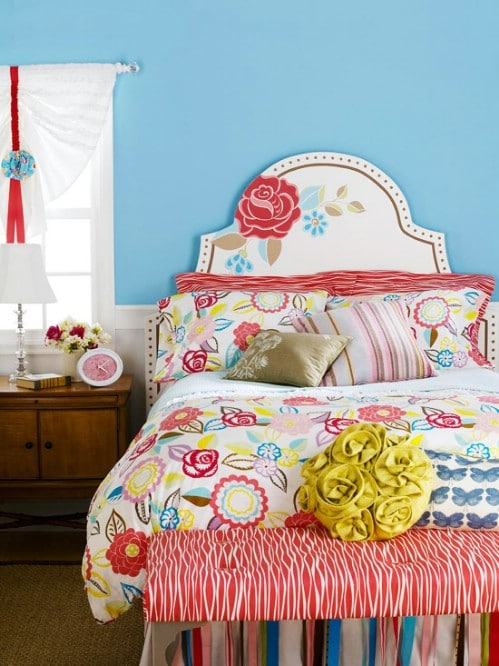
If you already have a plain wooden headboard and you just want to dress it up a little, painting it is an excellent idea. You will need to sand it first to ensure that it’s nice and smooth and then add a water base sealer. Paint whatever you like on it but we think that these florals are absolutely breathtaking and this would be a great project for a spare bedroom. Imagine how great your visitors will feel when they wake up on this bed every morning. Just grab some stencils or freehand it, however you want to go.
DIY Instructions and Project Credit – Bhg

Ikea Hack DIY Stikwood Headboard
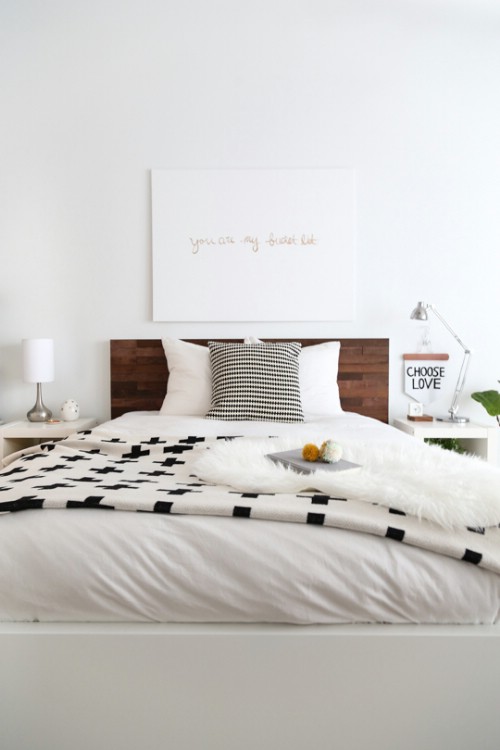
Don’t you just love Ikea hacks? This great headboard uses Stikwood which is actually reclaimed wood that’s already got adhesive on the back so you can put this headboard together in no time. It’s got a great reclaimed wood look but you don’t need drywall screws because the wood itself is sticky. You just have to choose the size of your wood strips and then apply them to a bedframe or even a sheet of plywood if you want. You end up with a beautiful headboard that costs so much less to make than people will think and it takes just a couple of hours from start to finish.
DIY Instructions and Project Credit – Sugarandcloth
Upholstered Headboard
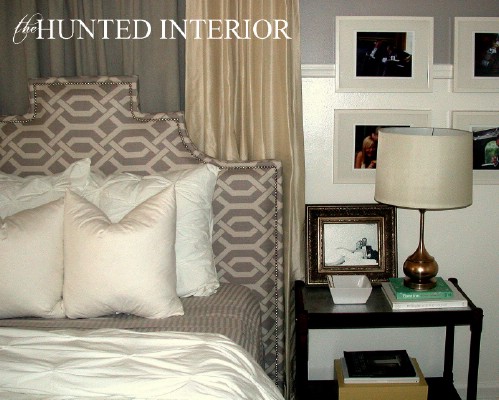
Upholstering is actually not as difficult as it sounds. If you want to try it out for yourself, make this gorgeous headboard. Not only is it easy to make, you can create a beautiful design that will instantly change the entire look and feel of your bedroom. Higher headboards are very elegant and if that’s the look that you want to recreate, try cutting your plywood a bit higher than your current headboard and give it a little design. Then just cover in batting and fabric and tack it down. Once you finish this project, you may just be confident enough to tackle those chairs that need reupholstered.
DIY Instructions and Project Credit – Huntedinterior
Striped Headboard
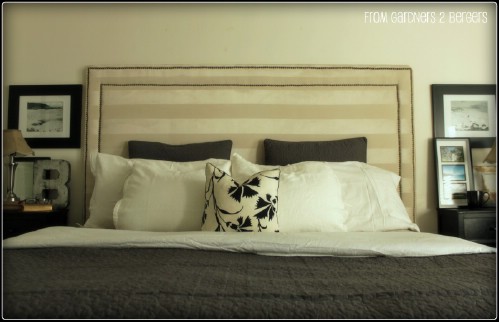
Stripes make you look smaller, right? Well they can do the same thing for your bedroom. This striped headboard is perfect for creating the illusion of more space. Plus, it’s just really pretty. You’ll need a piece of plywood large enough to act as the headboard and then you just cover with fabric. Keep the fabric in place with adhesive spray so there’s actually no stapling or nailing. You can add batting if you want a softer headboard and then go around the edges with a nail head design or create any design you want. The stripes are really elegant and the entire thing won’t take more than a day to complete.
DIY Instructions and Project Credit – Fromgardners2bergers
Diamond Tufted Headboard
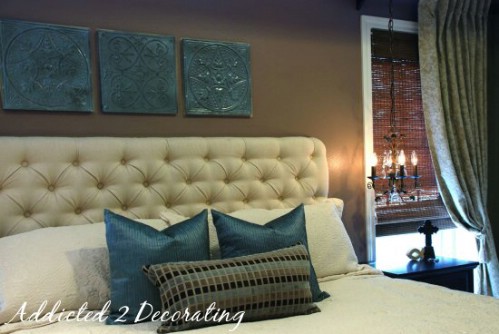
If diamonds are a girl’s best friend then this headboard is certainly going to be a favorite. It has a nice vintage diamond tufted design that is actually much easier to make than it looks. If you want to bring a little classic elegance to the bedroom, this is certainly a good choice. The batting is actually foam strips so the headboard is really soft and you can use buttons to hold the design in place. The entire thing takes just a couple of hours to complete although it looks like it takes much longer.
DIY Instructions and Project Credit – Orange-sugar
Canopy Headboard
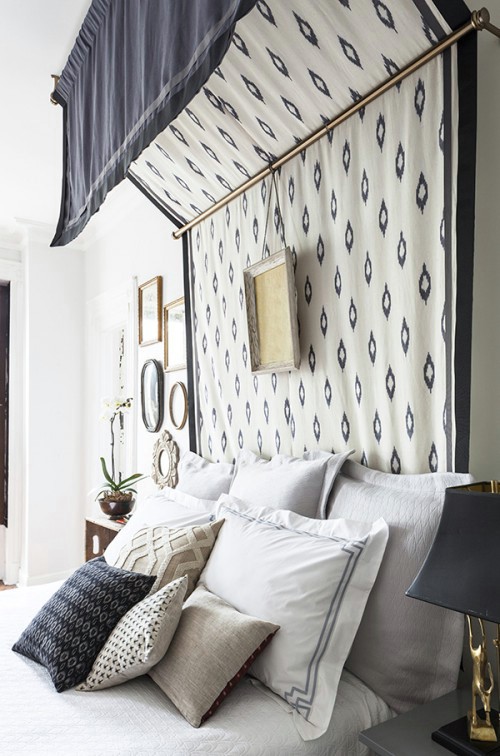
A canopy headboard is a great way to make your room look elegant and sophisticated. The great thing is that you don’t actually have to spend a fortune to get the look. You can just DIY it. You will need enough fabric to span the width of your bed plus the height from your bed to the ceiling and a little extra. You also need adjustable curtain rods, curtain hardware and then screws to attach it all to the wall. This is such an easy headboard and one that will make the entire room beautiful. You just create the canopy and then loop it through the curtain rods and attach to the wall. Easy, right?
DIY Instructions and Project Credit – Designsponge
Wrought Iron Headboard
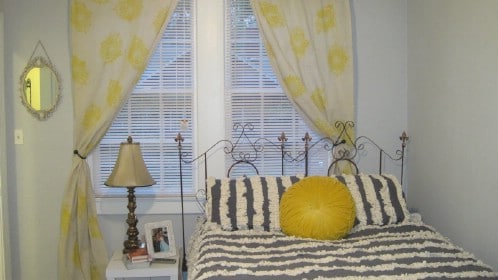
An old piece of wrought iron fencing would make a beautiful headboard. If you don’t have a piece of fencing available, you can pick up a rusty old one at a flea market or yard sale. You only need one section so it won’t be expensive and then you have everything you need to create a gorgeous iron headboard that resembles a daybed frame. You’ll need to sand down the rust and probably spray paint it to make it look new again but the entire thing can be completed in less than a day. Plus, you get a beautiful iron headboard that looks way more expensive than it actually is.
DIY Instructions and Project Credit – Somedaycrafts
Rope Headboard
This rope headboard is a Pottery Barn knockoff and it is a lot less expensive to make than it is to buy. The headboard itself is actually an old door that you just cover with rope. You can get old doors at thrift stores for next to nothing and a package of rope is less than $10 no matter where you buy it. This is such a neat idea and it’s really easy to make. It does take a little longer than most DIY headboards considering you have to painstakingly cover the door with the rope but you can still complete it in a day and it’s a really cheap project.
DIY Instructions and Project Credit – Ourfifthhouse
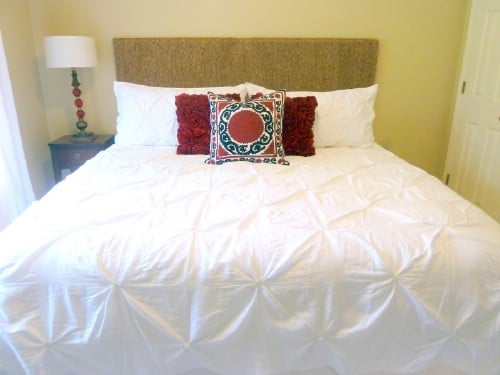
Folding Screen Headboard
An old folding screen is the perfect choice for a headboard and for many reasons. Whether you have an iron or a canvas screen, you can easily turn it into a beautiful headboard and with very little work involved. These things can be purchased at most thrift stores and flea markets for just a few dollars and they can be turned into the perfect headboard for large or smaller beds. If the screen is too tall, just lay it sideways. You can use bamboo, Chinese folding screens or any other screen that you may find and this is definitely a project that you’ll have finished before bedtime.
DIY Instructions and Project Credit – Homeguides.sfgate
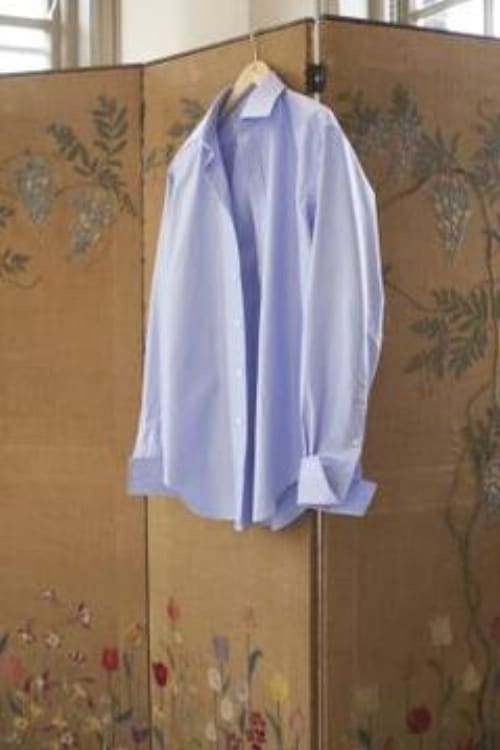
Light Up Headboard
Some wood strips and a few lights will give you a beautiful new headboard that actually doubles as a nightlight. You will need to build the headboard from the wood first and then stencil off whatever you want it to say. The lights are installed into the stenciling and the overall look is absolutely gorgeous. This is a really easy project in spite of how difficult it looks and it doesn’t really cost that much. You will need the wood so if you don’t have any on hand, that’s the largest expense. The stencils can be printed off for nothing and if you have a few lights on hand, you’re all set.
DIY Instructions and Project Credit – Abeautifulmess
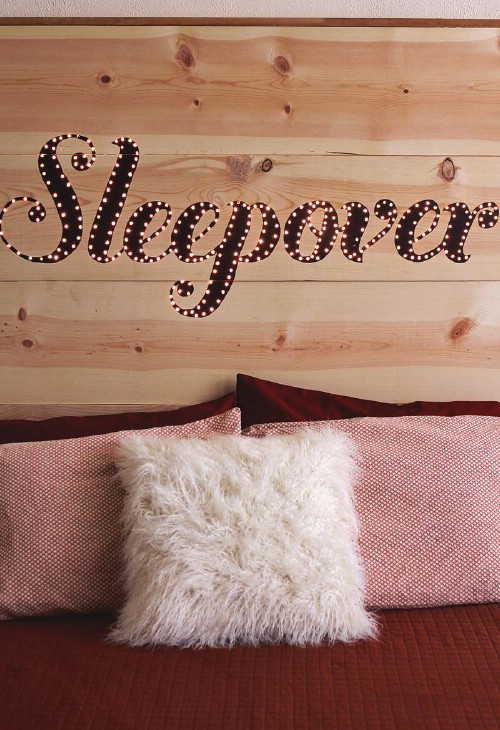
Headboard with Built-In Nightlights
For a kid’s room, this DIY headboard with built-in nightlights is absolutely perfect. It sort of resembles string art so it’s perfect for kids and you can actually do any design that you want. The plywood is covered with blue and then has stars attached and the moon acts as the nightlight. It’s a great project that the kids can help with and it costs very little depending on what you have on hand. The lights are actually clear Christmas lights which is just another reason to hit those day after Christmas sales and get these things really cheap.
DIY Instructions and Project Credit – Diynetwork
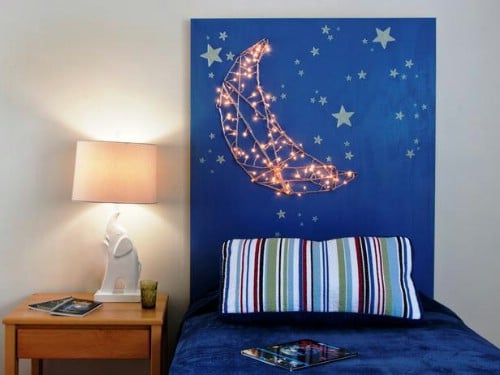
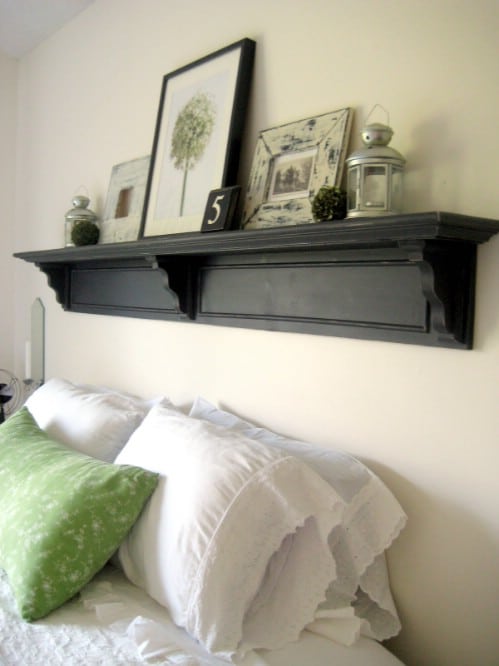
Headboard Shelf
Sometimes all you need is just a little something to catch the eye. This shelf above the bed is perfect for an acting headboard without actually having to build a complete headboard. Now, you can always buy a shelf to install above your head but why buy when you can DIY? For this you’ll need a face board, a couple of 1X6 and 1X8 boards and the hardware to install your shelf on the wall. You may also want to think about paint/stain and decide what color you want to do. Once you’re finished, you have a beautiful shelf that can hold your favorite trinkets and doubles as a headboard.
DIY Instructions and Project Credit – Robin-happyathome
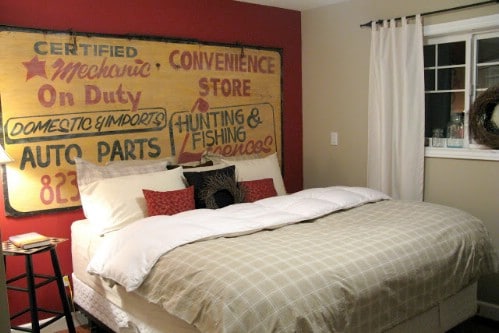
Vintage Sign Headboard
Depending on the look that you are trying to pull off, an old sign may be the perfect headboard. This is probably the easiest of all DIY headboards because there is very little work involved. You will need to find an old sign which you should be able to purchase at flea markets or thrift stores. Just get something that you really like and then you’ll turn it into a focal point above the bed. If you can’t find an old sign, you could actually make one yourself. Just get some plywood, mark out what you want on the sign and then paint. Go online for inspiration of old signs if this is the look that you want and you can print off stencils as well.
DIY Instructions and Project Credit – Funkyjunkinteriors
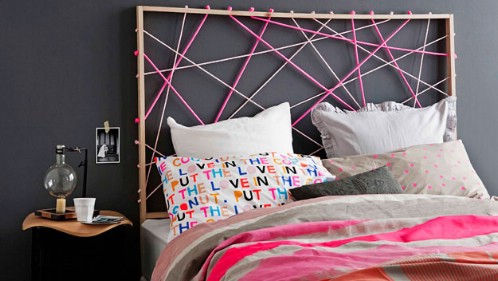
Rope Design Headboard
So, if you love string art then you will really love this rope design headboard. It’s whimsical and so very easy to make. You’ll need a couple of pine timbers and at least two different colors and/or types of rope plus a few other key supplies like glue, screws and a handsaw. What you basically do is just cut the timbers to create the frame and then decide what specific design you want to make with the rope. This is the perfect headboard for teens because they can be as creative as they want and it’s so easy that the kids can build it by themselves.
DIY Instructions and Project Credit – Homes.ninemsn
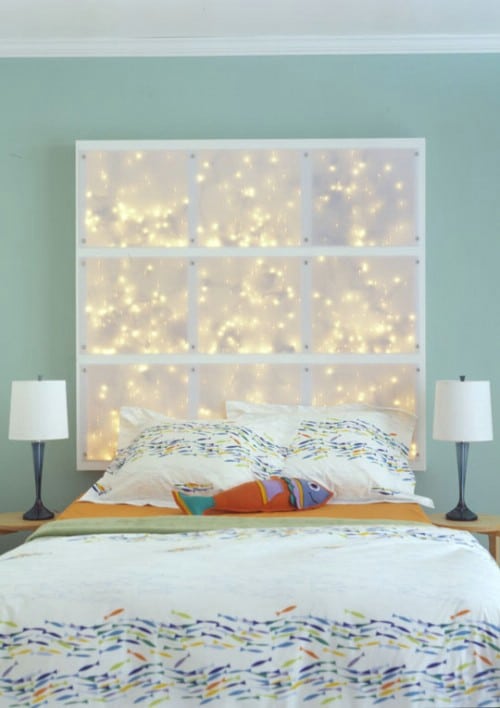
Starry Window Headboard
What a beautiful headboard! This one is covered in “stars” and looks like a window so you can literally lay in bed and stare at the stars at night. The stars are actually LED lights which are really cheap. It’s an easy project. You just have to build a frame from 2X4s and then add crossbeams. Then just drill holes into your frame so that you can add the lighting cords, paint the frame, and attach your new headboard to the wall. You can cut panels from a polycarbonate sheet to make it hold to the wall better.
DIY Instructions and Project Credit – Apartmenthterapy
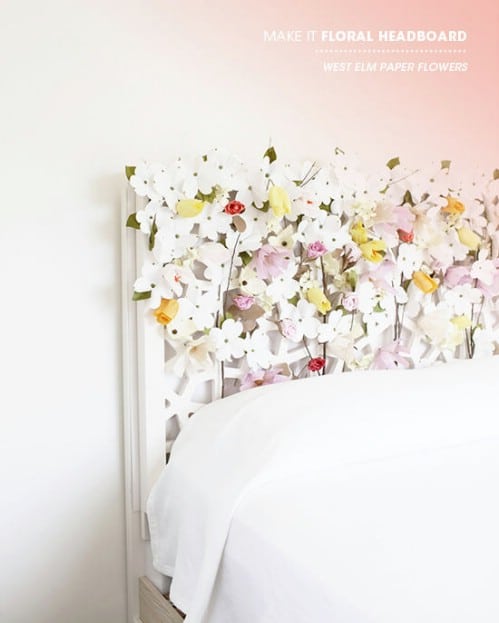
Blooming Headboard
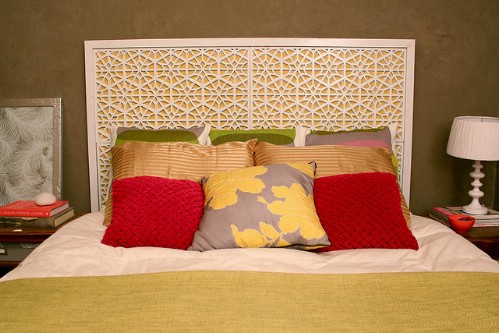
What better way to relax than under a bed of flowers? This beautiful blooming headboard requires just a few supplies and you can make it in just a couple of hours. You’ll need a morocco styled headboard, white paint if your headboard isn’t already white and some paper flowers. You also need artist tape and floral wire to hold the flowers in place. You can do this with a headboard that is already completed or build one yourself. Just remember to create the morocco design so that you have holes to add the flowers.
DIY Instructions and Project Credit – Designlovefest
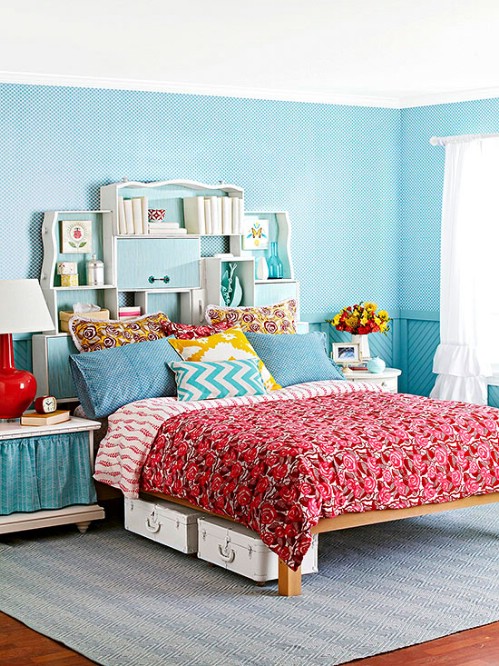
The Ultimate Storage Headboard
We all love extra storage and this storage headboard is perfect for giving you additional places to keep things as well as giving you a wonderful new headboard. Believe it or not, it’s build from old drawers. You don’t have to actually build the storage section. You just find drawers in all sorts of shapes and sizes, paint them all the same color and then assemble them in whatever design you want above the head of your bed. It’s a beautiful look that is also very functional. You should be able to find loads of drawers from old worn out dressers or check thrift stores and yard sales.
DIY Instructions and Project Credit – Bhg
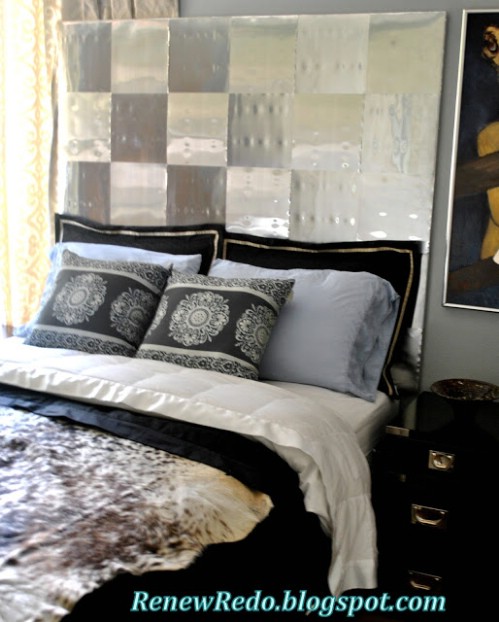
Aluminum Flashing Headboard
Contrary to popular opinion, aluminum flashing is not just for the kitchen. You can use it to create a stunning headboard that is as cheap to make as it is easy. You’ll need MDF board, aluminum flashing and staples to hold the aluminum to your board. You just weave the flashing strips onto the board like weaving a basket and you end up with a beautiful headboard that will take you just a couple of hours to finish. Plus, it’s a really inexpensive way to get a great looking headboard that is beautiful and unique.
DIY Instructions and Project Credit – Renewredo
Headboard Slipcover
If all you really need is to just cover up an old worn out headboard, this slipcover project is the perfect idea. You just sew together a slipcover to perfectly match the headboard’s size and then just slip it over. Even if you’ve never sewn slipcovers before, this is a really easy project and you can make a few if you want so that you can change the look of your room whenever you feel like it. It only takes about four yards of fabric which is really not that expensive so you can afford to do at least two slipcovers and change them up whenever your mood changes.
DIY Instructions and Project Credit – Hgtv
West Elm Morocco Headboard
This DIY West Elm Morocco Headboard is beautiful, cheap and very easy to make. It’s actually made from a rubber mat so instead of spending around $300 for a real one, you can make your own for less than $30. You may need two mats depending on the size of your bed and you will want to decide the color so that you have paint ready. The mats are attached to a piece of plywood to make them sturdy and then attached to the wall. If you want a true West Elm Morocco look, you will want to paint the plywood the same color as your wall so that it looks like there is no backing.
DIY Instructions and Project Credit – Karapaslaydesigns
Pegboard Headboard
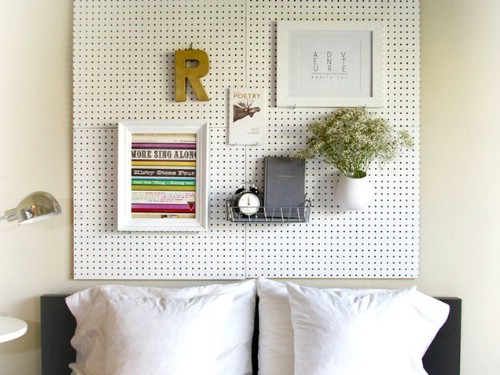
A pegboard for a headboard? Why not? This is a great headboard project for teens because it gives them the perfect place to keep everything. You can add baskets to the pegboard for holding cell phones and other gadgets and they can decorate their headboard however they like. You’ll need four pegboards, which are really inexpensive, and hardware to hang them directly on the wall. When you have them in place, just add hooks, baskets or whatever else you want so that you can attach pictures or store your favorite items right above your head.
DIY Instructions and Project Credit – Sugarandcloth
Unknown
Lorem ipsum dolor sit amet, consectetuer adipiscing elit. Aenean commodo ligula eget dolor Aenean massa.


0 comments